


A 3D circuit designer that runs right in your browser. Drop components onto a breadboard, wire them up, simulate the circuit, and ask the built-in AI tutor for help.
Try it live at sparky-na2c.onrender.com
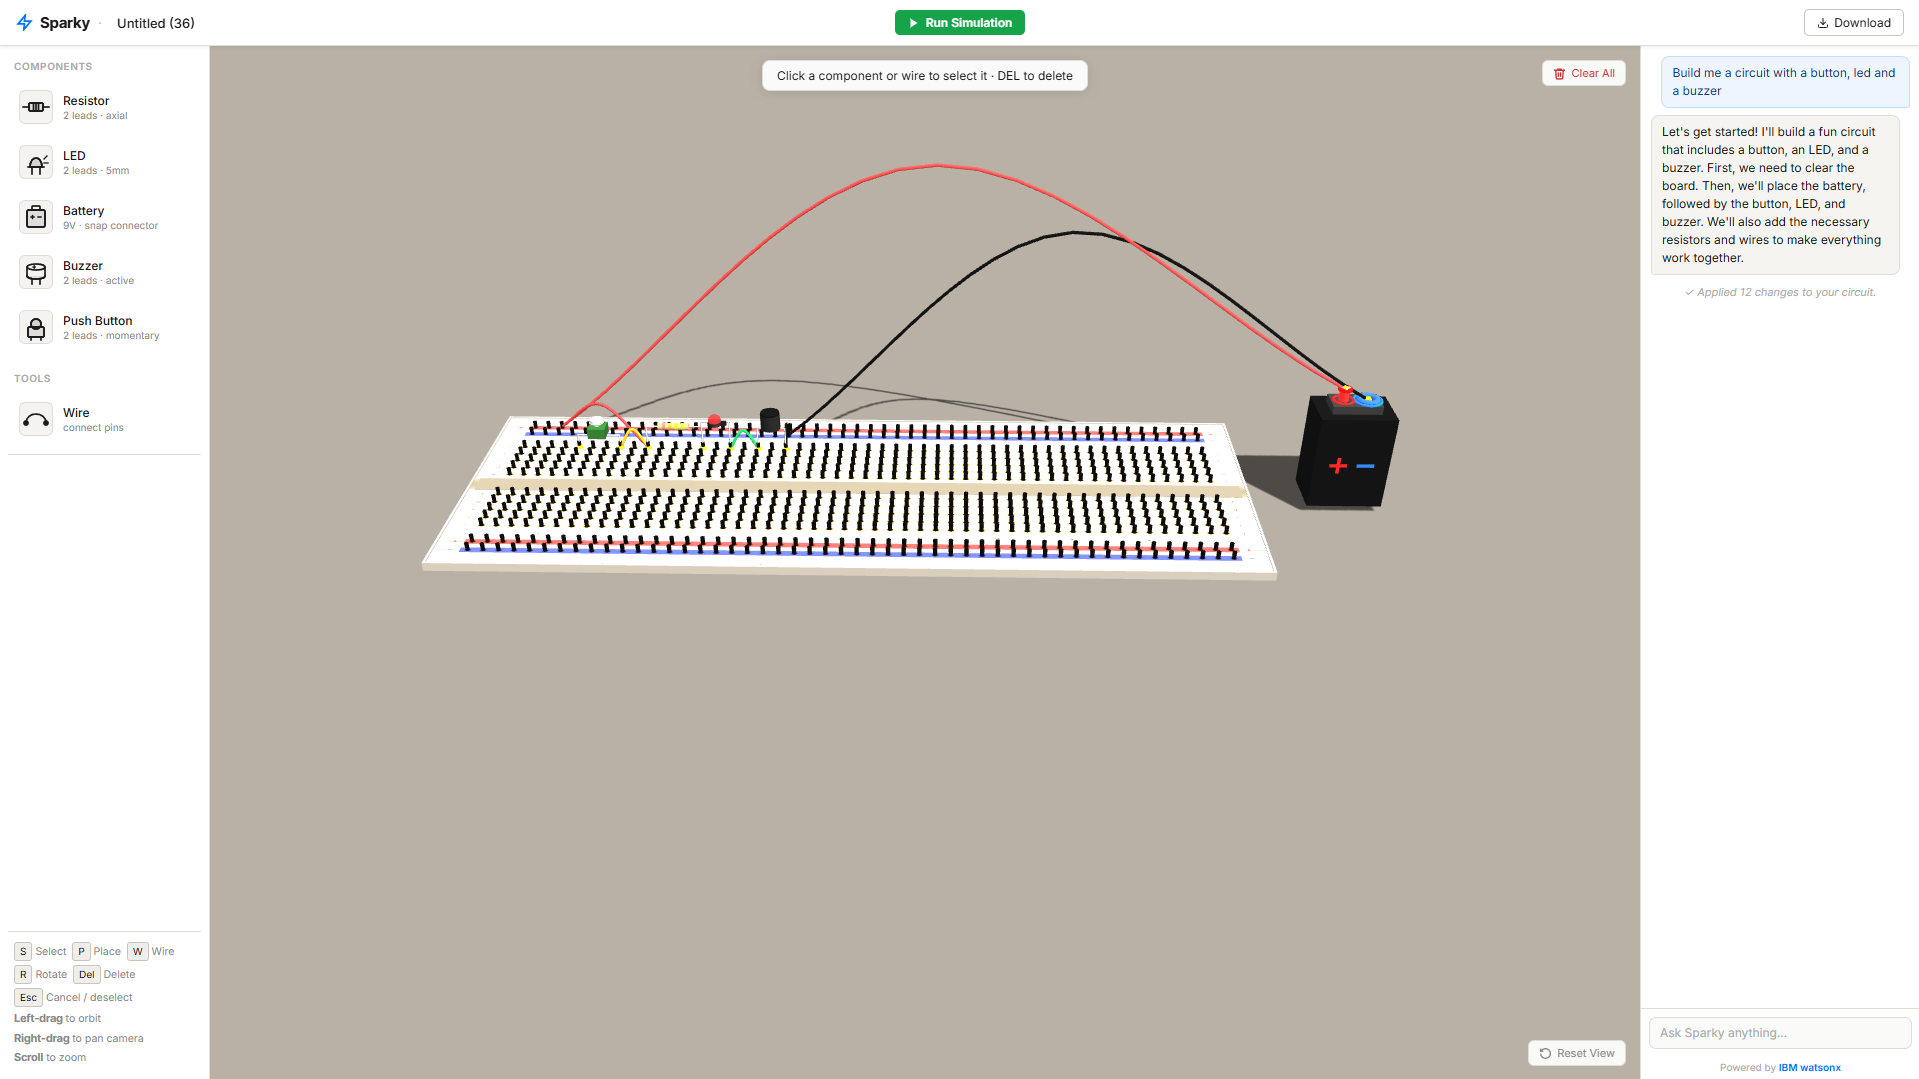
- Build circuits in 3D -- place resistors, LEDs, batteries, buzzers, and push buttons onto a realistic breadboard
- Draw wires between any two holes or pins, pick from 6 colors
- Simulate -- hit play and watch LEDs light up, click buttons to open/close the circuit in real time
- AI tutor -- ask Sparky a question and it explains what's going on, or tell it to build a circuit and it places the parts for you
- Conversation memory -- Sparky remembers your conversation within a session so you can build on previous messages
- Save and load -- export your circuits as
.sparkyfiles and share them
Open circuit3d/index.html in your browser. That's it. No install, no server, no npm.
The AI tutor needs the backend, because that is where the Gemini key lives. The browser never holds a key: the chat panel posts to same-origin /api/ask and the server calls Google.
Run the backend if you want the AI tutor. The 3D designer, wiring and simulation all work without it.
backend/server.js is a standalone Node 18+ server with zero npm dependencies. It serves the static files and exposes /api/ask, which is what the chat panel calls. It also carries optional Google OAuth routes and Cloudant storage, which the shipped frontend does not use: sign-in and cloud sharing go through Firebase Auth and Firestore.
cd backend

# Create a .env file with your API key
echo "GEMINI_API_KEY=your_gemini_api_key_here" > .env

node server.js
Then open http://localhost:5001.
| Key | What it does |
|---|---|
S |
Select mode -- click stuff to select it, then Delete to remove |
P |
Place mode -- hover to preview, click to drop |
W |
Wire mode -- click two holes/pins to connect them |
R |
Rotate component before placing |
Esc |
Cancel whatever you're doing |
Ctrl+Z |
Undo the last placement, wire, delete, Clear All, or file open |
Ctrl+Shift+Z |
Redo |
You can also just click components in the sidebar to start placing them.
The simulator models the breadboard as a graph. Holes in the same column on the same side of the center channel are electrically connected (just like a real breadboard). Power rails run the full length of the board.
When you hit simulate, it:
- Maps every hole and wire into a connectivity graph using Union-Find
- Finds all paths from battery+ to battery- (not just the first one, this is what makes parallel circuits work)
- Calculates current through each path:
I = (9V - LED voltage drops) / total resistance - Lights up any LED getting enough current
Push buttons work during simulation too -- click them to toggle the circuit on and off.
When you send a message, the app snapshots your entire board (components, positions, wires) as a markdown table and sends it to Gemini along with your question and your conversation history.
Gemini uses function calling to interact with the board. Instead of generating raw JSON, it calls structured tools like place_resistor(holeA="a3", holeB="a7") and add_wire(from="tp_3", to="a3", color="red"). The returned tool calls are shown as a ghost preview first, and only get applied to the board when you accept them.
So you can literally type "build me 3 LEDs" and watch it happen.
Before returning the tool calls, the server checks the proposed circuit for problems it can describe: an unpowered battery, a backwards LED, an LED that is not between power and ground. It reports them alongside the reply rather than silently rewriting your circuit.
landing.html          Marketing page + Firebase sign-in
dashboard.html        Saved circuits, shared "sparks" (Firestore)

circuit3d/
  index.html          The app (+ inline chat JS and Gemini calls)
  css/                 Styling
  js/
    scene.js           Three.js scene setup
    breadboard.js      Procedural breadboard geometry
    components.js      3D component models
    interaction.js     Mouse/keyboard handling
    simulate.js        Circuit simulation engine
    app.js             Ties everything together

backend/
  server.js            AI backend + static server (zero npm dependencies)
  .env                 Your API key (not committed)
Everything is vanilla JS. No build tools, no frameworks, no bundler. The 3D components are all built from basic Three.js shapes, so the whole app works offline from the file system (minus the AI).
| What | How |
|---|---|
| 3D | Three.js r128 from CDN |
| Frontend | Plain HTML/CSS/JS |
| AI model | Gemini, called server-side. Defaults to gemini-flash-latest, set GEMINI_MODEL to pin one |
| AI features | Native function calling, conversation memory, preview before apply |
| Auth + cloud storage | Firebase Auth + Firestore |
| Optional backend | Node.js http module, zero dependencies |
| Variable | Required | Description |
|---|---|---|
GEMINI_API_KEY |
Yes | Your Google Gemini API key (get one here) |
GEMINI_MODEL |
No | Gemini model id (default: gemini-flash-latest) |
AI_PROVIDER |
No | gemini, claude for the local Claude Code CLI, or fixture to replay recorded responses with no key |
PORT |
No | Server port (default: 5001) |
GOOGLE_CLIENT_ID |
No | Google OAuth 2.0 client ID (for login, setup guide below) |
GOOGLE_CLIENT_SECRET |
No | Google OAuth 2.0 client secret |
CLOUDANT_URL |
No | IBM Cloudant URL (for cloud circuit storage) |
CLOUDANT_APIKEY |
No | IBM Cloudant API key |
GEMINI_API_KEY is required for the AI tutor unless you set AI_PROVIDER to claude or fixture, which need no key at all. The rest are optional: Google OAuth and Cloudant power the backend's own login and storage routes, while the shipped frontend uses Firebase Auth and Firestore for sign-in and cloud sharing.
This is optional and applies to the backend's own login route only. The shipped app signs in through Firebase, so you do not need any of this to use Sparky.
- Go to Google Cloud Console
- Create a new project (or select an existing one)
- Click Create Credentials → OAuth 2.0 Client ID
- Set application type to Web application
- Under Authorized redirect URIs, add:
http://localhost:5001/api/auth/callback(for local dev)- Your production URL +
/api/auth/callback(if deploying)
- Copy the Client ID and Client Secret into your
.envfile
Made by Enes Yilmaz and Colin Lee